Netscape
Configuring Netscape Email
To configure this email client with the POP before SMTP relay:
- Open Netscape Mail.
Netscape users may experience problems with collecting their mail. In this case, mail server login name must be written with the % character instead of the @ sign, e.g. username%example.com. Netscape only supports a clear-text SMTP AUTH protocol so SSL use is required.
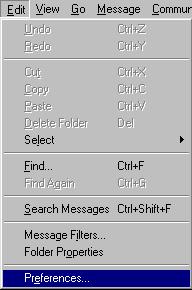
- In the top menu bar, select Preferences from the Edit drop-down menu:
- Click Mail and Newsgroups in the left menu and select Identity. On the page that appears:
- enter your name as the following example shows
- enter the email address of the account you’re setting up
- enter the reply email address (usually the same as email address):
- Select Mail Servers in the left menu and click Add against the Incoming Mail Serversfield.
- On the dialog window that shows, choose the General tab and fill the form:
- Enter the Server name;
- Choose POP as Server type
- Enter User name
- Select Remember password if you want to login to your mail account without having to type a password every time.
- Optionally, select Check for mail every specified period of time.
- Select the POP tab to choose different Incoming Mail options.

- Click OK to save settings.
- Back on the Mail Servers page, enter the Outgoing Mail Server info:
- Enter Outgoing Mail Server name;
- Enter User name (make sure to type full email address in this field).

- Click OK to save settings.
Now your netscape mail is configured and you are welcome to use it.
Configuring with SMTP Auth relay
- Repeat steps 1-8 from of the instructions above
- Under “Use Secure Socket Layer (SSL) or TLS for outgoing messages”, selectAlways.
- Click OK to save settings.
Now that Netscape Mail is configured, you can send and receive emails.