Outlook Express
Configuring Outlook Express
To configure this email client with the POP before SMTP relay:
- Open Outlook Express.
-
In the menu bar, go to the Tools drop-down menu and select
Accounts.

-
On the page that shows, click Add and select Mail.

-
On the wizard page that shows, enter your name in the field and click
Next to proceed.
Note: this email will appear when you send out emails.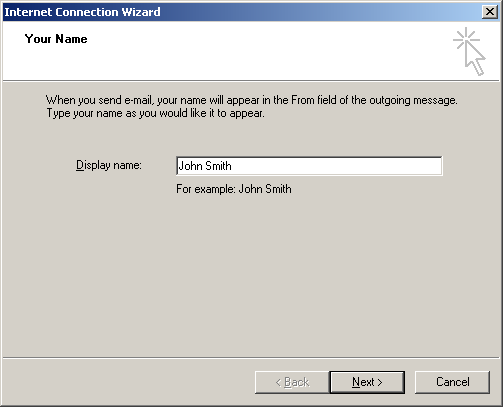
-
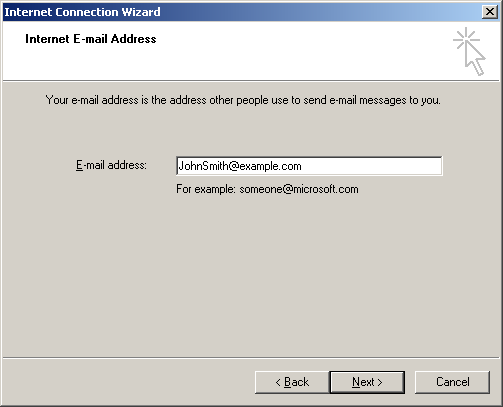
On the page that shows, enter your Email Address and click Next
to proceed.
-
In the form that shows:
- in the drop-down box, choose POP3 as your incoming server;
- enter the Mail Server Name for both Incoming Mail and Outgoing Mail;
- click Next to proceed.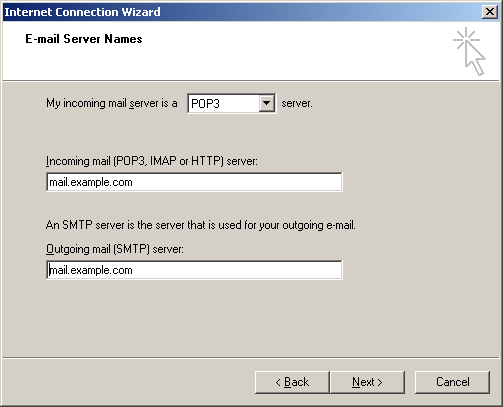
-
On the page that appears:
- make sure to enter full email address in the Account Name field;
- enter mailbox password in the Password field;
- check the Remember Password box to avoid entering it every time you check or send email;
- click Next to proceed.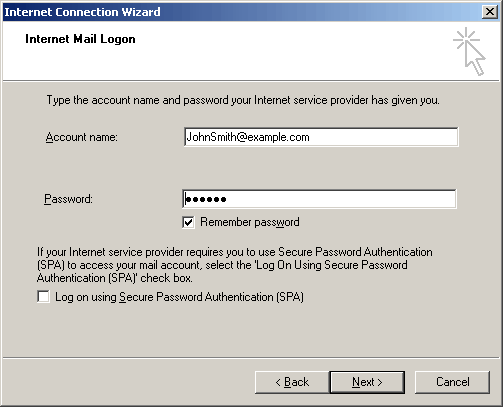
-
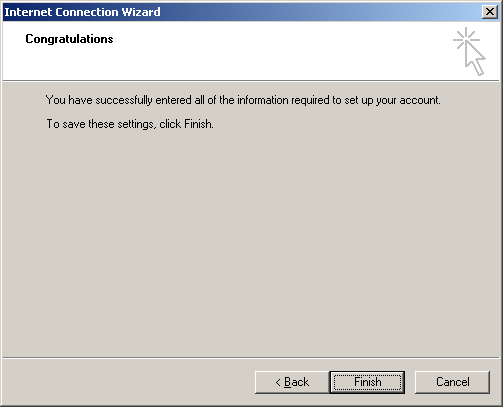
On the page that shows, click Finish to save settings and get back to
the list of email accounts
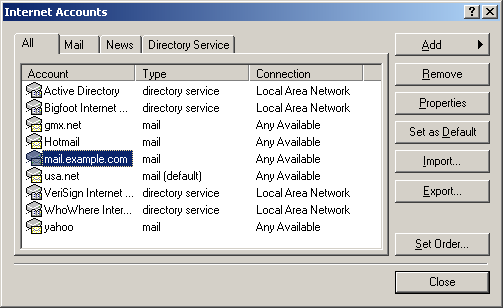
- Now that email account is created, select Accounts from the Tools drop-down list in the menu bar.
-
On the Internet Accounts window, select the newly created mail
account and click Properties to edit the settings for your email
account.
-
On the Properties page that appears, choose the General tab
and check the settings of your email account.
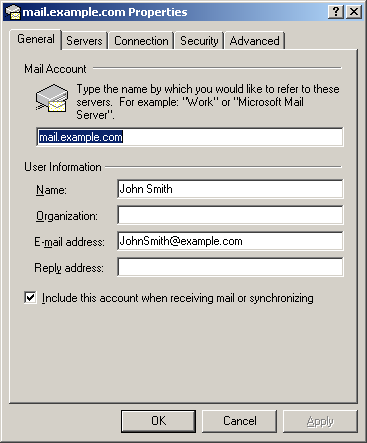
Here you can:
- set the name that will show in your letters
- set reply email (should be the same as email ) - Click Apply and OK to save settings.
Configuring Outlook Express with SMTP Auth Relay
You can set SMTP Auth relay right after your email account is created (steps 1- 8) as described above. To set SMTP Auth, do the following:
- Select Accounts from the Tools drop-down menu in the menu bar.
-
On the Internet Accounts window, select the newly created mail
account and click Properties to edit the email settings.

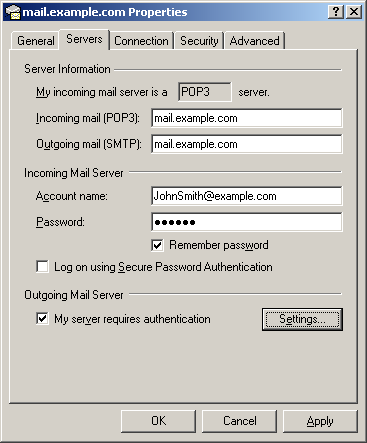
- On the Properties page that appears, choose the Servers tab.
-
Check My server requires authentication box and click Settings
on the right.
-
On the Outgoing Mail Server window that shows you can:
- use the same settings as incoming server;
- enter account name and input another password for outgoing email.
Note: make sure to check Remember password if you don't want to enter password each time you send out email.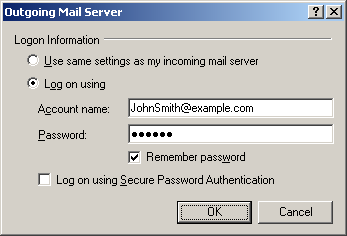
- Click OK.
- Back on the Properties page, click Apply and OK to save settings and then close all dialog boxes.
Now that Outlook Express is configured, you can send and receive emails.
